Dannopower
-
Posts
421 -
Joined
-
Last visited
Everything posted by Dannopower
-
Ok, the stocker with Standard dump pipe, a new cat and centre muffler removed is at her limit at 290rwkw in the ute. I have contemplated 3 options, thought I'd run it pass you guys before start annoying exhaust shops here in Canberra. Option 1) Buy a SMB dump pipe (or anything equivilent, open to suggestions), use my current 4 inch stellite cat, then get a custom made single 3.5 inch system using 1 good muffler only. Option 2)Buy a SMB dump pipe (or anything equivilent, open to suggestions), use a splitter pipe to go to dual 4 inch stellite cats, then make a duel 3 inch system, with a cannon muffler and tailpipe coming out of each side of the spare wheel in the tail. Option 3) Buy a SMB dump pipe (or anything equivilent, open to suggestions), use my current 4 inch stellite cat, have a single 3.5 inch pipe back to a new muffler (located where my Centre muffler used to be, then have a duel single tail pipe on each side of the spare wheel in the tail. Option 1 makes more sence, Option 2 will cost me an arm and a leg and option 3 probabaly wont even work with such a long tail section. Any suggestions??
-
Short answer, yes to both. As for what injectors, who drills the stockers etc, I'd suggest the Nizpro drilled or Bosch 968 if you want new ones. As for the fuel pump, a Walbro intank will work a treat! looking at your mods, it will see you up in the desired 250-300 bracket.
-
Thanks mate. Havent got a retune yet, but I have had it dynoed to check the afr's are well and truly safe. It now has pulled exactly 287 on 2 dynos, consistantly. Actually, Im pretty happy that my car has been now on 6 different dynos in Canberra and has a lowest max power of 273rwkw. its killing the tyres though! I have plans for a dual 3 inch exhaust system with double tailpipes similar to the maloo, so if I get that organized I'll get a retune then!
-
Catrol Magnatec 05w40 here, only available from Castrol distributors in 20 litre drums. Good stuff though!
-
Wouldnt you remove the FPV Bezel and use the one on the guage???
-
not really mate. The chassis on the BA's is such a well designed, solid unit compared to previous models. It would be more efficient to drill holes or cut it out completely like some people have, but there is an amount of common sence that takes over any thought of me doing that. The front bumper would still deflect any air away anyway. I drive this car 100km a day thru winding, kangaroo lined roads. I love the performance aspect of my ute, but I value my life a little more. The chassis stays nice and strong.
-
Thanks mate!
-
is there any tranny fluid in your overflow tank? Does it look more milky/ frothy than green?
-
Yeah, yeah, were all comedians. Actually I thing a bamboo cooler would work better than the stock one anyway!!!! I tell you, I'd rather router out any piece of timber over grinding that f#$king front chassis rail anyday!
-
No Probs mate, I can honestly say I can carefully and neatly pull your entire front bar off and stock intercooler out in 45 mins! Just putting the new one in that's a bas*ard!!!
-
Thanks mate! You should see what I can do with a few woodworking tools buddy!!! I think for a woodworkshop I seem to do ok with the engineering too! hahah!
-
yeah, the silicon hose was a problem under the headlight, I had to loosen all the alloy casting bolts and wiggle the casting around to get the silicon hose around further to the grille area to stop that. It was a bit of a bas*ard, I had to take the battery and battery tray out to do it, and redrill a hole to re-situate the alloy casting mounting pins. The gap under my headlight is only 6-8mm. I like the look of it, its sits in the centre and sits level, which is something a lot of other coolers have struggled with. Certainly gets peoples attention more, and it kicks the typhoon cooler as far as cooling and flow capacity.
-
Need a speed auto in her mate, but go the Nado
-
Welcome to the Hyperflow install club buddy! I hope your power steering is your only trouble! Check this http://www.fordxr6turbo.com/forum/index.ph...topic=21567&hl=
-
Just read a post from another guy who has installed the Hyperflow intercooler, like I put in mine 4 weeks ago. Like all replacement intercoolers I have looked at that are claimed "Direct replacement", Its certainly not the case for a majority of manufacturers. Im sure everyone that has fitted one themselves (depending on how good of a job they did) will agree. There seems to be similar problems with the majority In my opinion, there is 2 options, one is to spend good $$$ and buy a good one that is an absolute mongrel to fit. Coolers like the Hyperflow, ASE, PWR etc, top quality, but installation issues with all of them. The second is to spend less $$$ on a cheaper one that may fit a little easier. I have seen some coolers that fit in easily but the workmanship is ordinary. In fact, they look like something some chinese guy has built sitting cross legged in the dirt using coke cans and a bic cigarette lighter as a TIG welder. Anyway, After doing some homework, I bought the Hyperflow one, and thought I'd share a list of things that I did during the installation to get it to fit and operate. Throughout the entire installation, as you guys will probably realize, I wanted everything to be in neatly, and without ANY risk of the cooler touching anything like the front chassis, or the air con. The Hyperflow has a 100mm core thickness, which combined with the overall length of the cooler was never going to fit in between the air conditioner core and the rear of the front chassis rail, which at the outside measured 99mm as it was. So, Out came the angle grinder, and 45mins and a grinding disk later, I had enough space to allow 4mm clearance at the front and back of the cooler. To neaten up the sharp edges of the chassis rail, and as a preventative measure of any risk of rubbing, I used some pinch weld from Clark rubber, to line the ground front edge of the chassis, and the bottom leading edge of the air conditioner core. the results can be seen in the pics below. Another obvious thing was in going to be trouble was the power steering cooler. Since I had a late 04 mk1, the cooler was located at the top. I tried the old turn them around trick, but it still wasnt enough. I had to take the brackets off, grind everything below the rubber mounting bolt off so it didnt touch the air conditioner core, then re bend them on a much more acute angle to get it to fit as high and as far back as I could safely install them without any risk of tapping on the air con or the top of the cooler (4mm Clearance). You can see the finished position in the above second picure. Second problem was the pipe on the side of the cooler. This looks trick, but is really nothing more than a pain in the bum when it comes to installing it. The angles of the bends are not right. This causes a heap of problems, see the pics. Biggest problem is the installation position being incorrect. The cooler is supplied with 3 fixing brackets, one on each side and another that is in the centre of the top. The alloy pipe angles really predetermine the mounting position, as the pic shows the intercooler sitting in using the brackets supplied. There is no way to get it right without doing one of 2 things, cut the alloy intercooler pipe and re weld it in the correct place, or re-make the mounting brackets for the cooler, sitting it up 20mm higher and 15mm back from where they said it would bolt into. Its a lot easier to make new brackets, so I did, all 3. After a lot, and I mean a real lot, of bad language, this is the result. You will notice the piece of timber wedged behind the cooler. I used this to make sure there was no matter what going to be a 4mm clearance space between the air con core and the cooler. There is another wedged in front between the chassis rail, but its not visible. These were of course removed once all the holding brackets were done up tight and the hose connected. The silicon hose reducer they give you is not the right size to fit to the cast corner under the headlight. Its about an inch too short, and way too loose on the pipe itself. You will notice I have inserted a rubber hose sleeve over the cast corner to build up the clearance (about 2.5mm too much). I couldnt get the silicon hose to fit any better than the pic shows. Its working fine, with no leaks what so ever thanks to some decent hose clamps. This is what the end result looked like before the bar and headlight were replaced. The round piece on the top right of the cooler is a threaded section to fix the horn bracket to. But since I had to lift the entire cooler higher to fit in, they needed a new custom made bracket to fit in as well. The thing that also became a concern, is that when the front bar and undertray went on, the actual bottom intercooler tank and pipe was pushing it down, and I couldnt put some of the undertray screws in as they would have either screwed into the tank or the hose! Imagine if I had not raised the brackets up by 20mm, there is NO WAY the undertray would have gone back on! I dont know how the manufacturers managed! And finally, this back to street trim. It was dynod and checked the afr's remained safe, which they did. The max power gained was about 6kw but it was reliability I was after, and it was the thing that changed the most. Before, it would loose around 5rwkw every dyno run done in succession, down to about 25rwkw down once it was hot. Now, after 5 consecutive passes, it actually gained on the second pass, but the difference between the max and minimum was only 5 rwkw. I thing with a retune, it will make more use of the new cooler, and maybe a pipe upgrade will help use the air flow much better, as the stock pipes are a real restriction. Hope you guys enjoy ther read! And good luck to anyone putting one in! I dont know how any workshop would charge for this level of installation workmanship (they wouldnt go to the trouble I did) as im no slouch with the tools and it took me 10 hours from start to finish, including bracket fabrication and painting, grinding and checking and double checking everything. If a workshop offers to install it for $200-$300, then im not sure what sort of a job you would get. Best of luck anyway!


-
Welcome to the forums mate. Do a quick search, I havent been able to find anyone that has ever been able to get 270-280 rwkw out of a completely stock car with just an edit. I'd suggest the 245- 255 mark would be more likely.
-
Yeah, some good input guys. They sound like the best option for me right now. Have only had one reply about using 265/40's on the rear, and 235/45's on the front. The rolling diameters are so close it prolly wouldnt make any difference. I like the idea of having a little more rubber on the back, but I think if I went too wide on the front the side wall will start rolling around on corners, hence the idea to stick with the 235's for the front. Opinions??
-
Fark! I would love to see a stock F6 hold 13psi at 6000rpm! I think it wouldnt take too long to get a real good look at it, Inside half a rod and all!!!
-
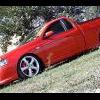
Just A few questions for you guys that know a lot more about wheels and tyres than I do! 1) What does everyone think of these new Toyo's? (See Attached!) 2) Is it possible to fit a 265/40 ZR17 to a standard XR17 inch rim? I was thinking about this for the rear! 3) Would it be a problem to fit a different size (235/45 ZR17) tyre to the front? Any other opinions about a good replacement alternative for the Sp3000's, which have 43,000km on them now?

-
and while Im shooting, Correct me if im wrong, But NO Tuner can upload another tuners tune from a CAPA box and view it, or make adjustments to it, Can they? If one tuner wants to know what someone else is doing, they have to pretty much look at the way the car reacts on the dyno, road test and make a calculated guess? am I right?
-
so how the hell can the tuning software tell the ecu it has something that it never had??? If this was the case, couldnt the current BA xr6 turbo ecu be told that the dual cam timing is independent, like the typhoon? Or that it has a BF 6 speed in it??
-
Thanks mate, As anyone who knows me, knows I wont put sh#t components in my car!!!!! The braided line is about $40 a metre, and the connection fittings are about $30 to $45 each, depending on the angles etc. All up, without the tranny cooler about an extra $250 I had to get Enzed to custom build a fitting that returns the fluid back into the return line, as the entire tranny cooler doesnt use any hose clamps, Just dash 6 screw fittings. All the installation brackets are made of primed 6mm alloy, as will all the fan mounting brackets.
-
So effectively a very short term immediate fix to a big problem!
-
Oh, ok, so the existing relay drops in first, then your new fan's relay will use the power after the existing relay to activate?? Thanks for your patience, For a auto electrician, I make really good furniture! Heres a few pics of what I have done so far!
-
Yeah, basically what your saying is you are only using the ecu wire to activate the relay, not the actual fan power? Ok?