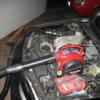
Well transmission service, steel pan and cooler install Done!!!! (for the TTG) Didnt end up going with a furious kit or transolutions kit due to joining lines and now that I used an alternative cooler Im glad I did. http://www.ebay.com.au/itm/111149979207?ssPageName=STRK:MEWNX:IT&_trksid=p3984.m1497.l2649 I had all sorts or trouble removing the transmission lines off the OEM heat exchanger. With OEM exchangers, oil filters, numerous water lines in the area there is simply not enough room IMO. After a lot of swearing and the like I finally managed to remove the coolant lines of the OEM heat exchanger and joined them together with the fittings provided in the kit. The exchanger is still on the side of the block as its impossible to remove (well for me anyway. Might have another crack when its due for a service) Im aware the cooler kit I used states for FG but between the FG cooler and the terry cooler there is no difference other than a slightly different bracket or a third bracket (Dont ask me which one) for a $30 price difference (Terry more expensive) I ended up making a small bracket that attached to the bottom of the cooler (Via the bracket provided) and on to the middle radiator support (Roughly in line with the number plate). So fitted the cooler and lines up yesterday. Its pretty straight forward although I found attaching the new lines to the transmission a little tricky room wise. Probably due to the transfer case drive shaft. One thing that I did find interesting was the plastic OEM lines. On the fittings that connect to the transmission they appear to be the same inner diameter to the new fittings that came with the kit so personally I dont think flow will be an issue. The kit came with everything needed including cable ties. So this morning I wet about "flushing" the fluid (drain, fill run through gears and repeat 3 or so times.... THANKS JET) Probably went through the best part of 10 - 12 litres of Gulf western Syntrans in the process. After the final drain the fluid removed was juuuusssssttt about the same colour as the new fluid so I satisfied that I'd done enough. The old fluid was very dark and now bright red, the colour of syntrans Next was removing the old plastic pan. A cordless drill with a torx bit here is a must. Just took my time here and removed the bolts/screws from the the back of the car to the front. Left all but two bolts/screws in the front (loosened) and was able to tilt the old pan to drain the remaining oil. Once the pan was off I gave the alloy surface a good clean (Carby cleaner on rag then wipe) ensuring that there was no left over gunk. Fitting the new pan was tricky. As the filter is not part of the pan you have to sit the filter on the pan and slowly lift it up into position. It sounds easy but with a gasket also floating around/in the way it definatly makes it more "fun". Got it all bolted/screwed up (thanks again cordless drill) and later tensioned up all the bolts/screws by hand So the final fill began at this point and followed the ZF doc to a degree. I had the car up on stands and whilst on the stands ran it through the gears again and later checked the oil level. Topped it up and all done. After cleaning up took it for a run and all good. The transmission "feels" better the way it shifts, smother if you know what I mean. Stopped and checked under the car and cooler connections. No leaks... HAPPY DAYS. So all in all the entire job took the best part of 7 hours without rushing. This is purely how I did the job and I don't recommend any one take this as the "How to" to do this.


