Leaderboard


-RABS4K.thumb.jpg.eb7f5cabb2776d08d3d8f0475f8ef966.jpg)

Popular Content
Showing content with the highest reputation on 24/07/16 in all areas
-
So things have kinda stalled a bit with the car (even more than the current snail pace) In saying that have managed to make so additions to the car. Cosmetic upgrades and this happened Went with a 18 x 9 +20 so will sit pretty flush Wanted to change the color so off to Alliance in Malaga Not much has been done to getting it back actually running, managed to wrap the dump. Its currently the small tasks I am celebrating Reason for the stall in progress Have kids they said, it will be fun they said haha5 points
-
hahah that guy was keen to swap for phils 17" xr6 wheels he had in his tray. taken moments before we were approached by dodgy person offering wheels. he had one in the boot.4 points
-
On the 7/7/77 I turned 7 Fact3 points
-
the number 7 is the Biblical number for perfection. So I had to pull over and take this pic as I was on my way to church3 points
-
All hooked up and working. Need to finish setting up the other screens and wheel/pedal/seat position and connect the Buttkicker. Quick play last night just to make sure it all works - not turning it on again until all the setup is 100% finished and the room is cleaned up. Definitely need to fine-tune the motion settings - farck there's some power in the unit Quick vid of a mate having a play:3 points
-
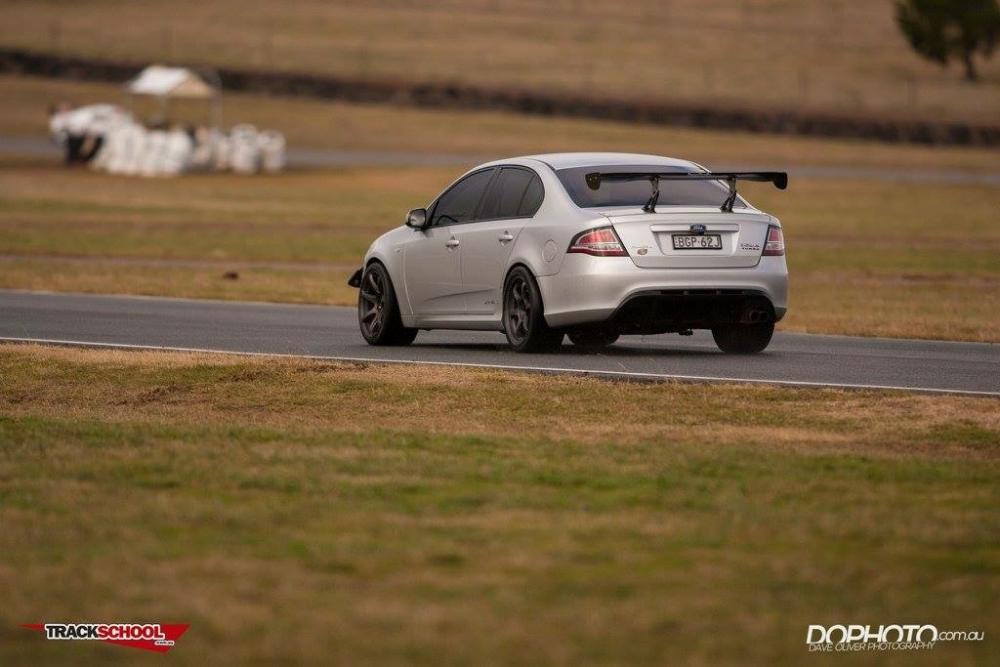
<-blockquote> Tested the final design at the Nulon Nationals at SMP GP yesterday and it worked flawlessly, even at 230kmh. First few laps waited to hear a big "crack" but all good. Car has never felt more planted through T1. 295's on the front, 265 on the back transformed the car. http://imgur.com/a/fitbq3 points
-
Little bit of unburnt fuel Screenshot cause 2 sec video lol Heres my few pics....will put the couple short dose vids later cause sleepy af.3 points
-
Pit crew getting back together lols2 points
-
I'll bring the c spanners again lol.2 points
-
Had a family get together cos my uncle had been diagnosed with cancer. Effing cancer. Anyway me and dad took a few people out for a drive in our cars cos it's a family of car people. I only had one passenger so I took smoke duties on a private road. Did way too much and the invos are pretty worn now but brightened a few people's day. My cousin finally smiled when smoke started coming in the windows. Wish I had videos but was spur of the moment haha. Car peed itself a bit afterwards. Whoops haha2 points
-
Yeh John ...was that very last one before your turnoff. Heres the only semi decent footage I got (excuse my giggle - literally all my footage has my ghey laughing...cause dose makes me happy I suppose lol).2 points
-
pssst. Anybody wanna buy some brand new rims outta the back of my car? Totally legit !2 points
-
Only the red/white one. Either a Cup or GT car? Came up on everything else in the group like they were standing still doing flat 60 sec laps. Black turbo was passed easily.2 points
-
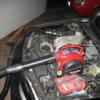
Here's a fairly quick run down on what needs to be done when retrofitting projectors into halogen reflector style headlights. Basically theres 2 ways this can be done, and depending on what you want or size limitations you have you may have no choice to use one way or the other. * Note this will only work with lights sealed with butyl rubber, silicon sealed healdlights require the lens to be CUT off. Tools Required : Both methods need basically the same tools minus a few things so I will list everything here: 1. heat gun/ large oven. 2. dremel tool with cutoff wheel, drill\cut bit, sanding bit 3. phillips/flat head screwdrivers 4. knife 5. needle nose pliers 6. Bench sander 7. compressed air of some sort Parts required: 1. chosen style of projector 2. butyl rubber 3. Paint ( if blacking out/painting lens) 4. 2 part epoxy ( I use jb weld + jb quick for setting initially ) 5. sand paper ( both for priming surfaces for paint and sanding lenses if required ) PPE required: 1. glasses 2. P2/cartridge mask ( trust me, you dont wana breathe this sh*t in ) 3. gloves for when the lights are super hot. 4. brew of choice ( for stress relief purpouses ) Method 1 ( the bolt in kit ) This is the easiest and least destructive way of doing installs. Can be reversed if absolutely necassary, but sometimes cant be performed because of how far they protrude out ( fg light ) , plus they dont look as good. 1. grab your lights and stick them in a preheated oven on a piece of super hard wood or something that wont allow the lights to melt onto the oven trays @ 210 degrees F ( dont ask me C, I dont use this method ) for about 15 minutes. Keep checking after 15 to see if the glue has melted suficiently. The other method is to use a heat gun and slowly heat up around the sealed section. You will know when the butyl rubber has gotten hot enough, it begins to go shiny and slightly bubbles. keep working around the light for a good 3 - 4 minutes to get even heat in it. 2. Grab your gloves, unclip any clips around the headlight, and begin to pull apart. I dont suggest to pry apart with screwdrivers as our lights have got soft plastic backings. the light SHOULD pull apart fairly easily. ( if it doesnt, some of your clips are still holding it back ) 3. Once the lights are apart, you will need to unscrew one screw in the b series. The other two clips are just ball joints, and will pop off with careful force. Your reflector is now out to play around with and retro. You should be able to just use the rubber washer, and then use the retaining nut to bolt your Projector though the H7 low beam hole, without any damage. Once in, feed any solenoid wires through the parker hole or a hole that you drill behind the projector and you are ready to reverse the process. use compressed air to blow out any contaminants! PART 2: The real "retrofit" So part 1 explained how to do a bolt in retrofit for all the guys not wanting to stuff their headlights up and be able to revert back to halogen, this part is going to explain how to do a proper retrofit. Possibilities are endless doing a retrofit this way, and its only really your imagination stopping you. All PPE, tools and equipment are already listed in part 1. This also allows you to do headlights with space constraints, such as the fg, where a simple bolt in wuld not have clearance between the front lens, and adjustability would severly suffer ( up and down, left to right ) Method 2: Splitting 1. To split the headlights, refer to method 1. You ust split the headlights in the same fashion, this does not change. Once the headlights are seperated, remove your lens and reflector like method 1 also. You will now have the lens, rear housing, and refelctor seperate ( or should ) What are you going to do with your lights? 2. once everything is apart, decide what you are going to do. A single projector retrofit typically will be mounted inside your low beam reflector. When doing quads ( twin projectors each light ) obviously both will have projectors mounted. I have found the FXR 3.0" prpjector to be the most versatile, especially for big cars/headlights like ours. It give the greatest performance, spread, and base to retrofit into lights. Although big and chunky, its robust and has a large surface area to work with. Cutsomisation before projector mounting 3. Any custom work you decide to carry out should be done now. As in blacking out the light assembly ( painting the whole assembly black, yes you can do this the light is only coming out of the projector bulb now! ) devil eyes ( makes the lens a colour by painting the innner parts of the projector assembly ) or painting the inside of the headlight a certain colour. The only custom part you do last is angel eyes if you are doing them. I do it this way because once you mount the projector, you dont wana be spraying things anywhere near the lens. Mounting the projector 4. Now its time to mount the projector. depending how far you want it to be recessed into the refelector, dictates how much cutting is needed. Remember, you can always cut more away, so less is more. Take yur time and cut in small increments. Start off by working out how deep you want to recess, then measuring how big of a hole you need to start with. Mirror that on the rear of the reflector and cut just smaller ( once again, cut smaller and work your way up ) fit the projector int the hole and see what parts hit first, and what needs to stay at that size cut. Continue to work the hole until you have a shape hole that matches the section of projector that needs to meet the reflector of the light assembly to recess it far enough for your liking. It doesnt have to be perfect, but the closer the better when it comes time to epoxying the bulb in. Use a cut off wheel to cut the initial hole ( its quicker ) then use the dremel/griding bit ( carbide drill looking bit ) to shape the hole. This is the most time consuming part I believe. remember this hole needs to be as centralised as possible, and keep checking the rear husing to see if it will foul aywhere, you may need to either not recess as far as you would like or consider modifying the rear housing to suit also. Repeat the process for your high beam if doing quads. Blow all dust away, clean and youre ready to epoxy. Setting your projectors permenantly 5. Once you are happy with the inset of you projector in its new mounting place, you need a way to secure it. Theres a couple of opitons: * You can use a bolt and nut with the 4 securing holes to hold it in * Epoxy in place * Bolt and epoxy in place Ideally, bolt and epoxy is ideal, but depeding on your skill and time contstraints, it may not be viable. ATLEAST epoxy, dont just bolt, They WILL move eventually. The advantage to bolting is you can align the projector wth the bolts the they will aid in holding the projector while you epoxy, but theres also another trick to align and hold. 2 part epoxy putty. Get 4 small balls, roll them up and stick them evenly around the porjector where they meet the reflector. While aligning, they will hold it tight enough to stay put but you will have enough time to move it around to get the alignment right. using jb kwik also works, but as the name states, it sets within 4 minutes, so be prepared and have everything ready to align when you use it, then hold for a few minutes in the right spot to set. Aligning 6. Once you have your 'tacks; ready, its time to align. put the refector back in the housing. Situate your headlight at normal car level ( or in car ideally ) against a plain coloured, flat wall. have your hid system already installed and on a 12v source plugged in. You will see the light has a sharp 'cutoff' line, which means the projector is doing its job. There is a dip or drop in the line, this is normal. Your ideal position ( when everything is at about centre, porjector aligned roughly to the centre) is at just below a cars side mirrors at 5M, or about 1M. This is not vitally important but a good bas to work from. The important part is the orienatuion of that cutoff. The line must be as close to horizontal as possible. Do what you can, tape a level to the wall @ 1M is a good idea. Twist the projector in the mount until you reach level. Now hold it there ( wether its with the putty or JB kwik ) and let it set @ level. This is crucial as you have a crooked cutoff and the whole theory behind having that cutoff setup in the first place is deemed useless. Dont worry about it being a little high or low, that's what adjusters are for. Just get that cutoff level. You want both upper lines and both lower lines of each projector to be at the same level also, to get that crisp, sharp line. If you can get this part done correctly, youve successfully retrofitted your first projectors. Securing 7. once our projectors are solid enough to once again pull out of the rear housing, do so. These tacks are not enough to hold it in place. Mix up enough epoxy to be abe to cover the whole rear area of the projector where the reflector meets the bowl of the projector itself. Good, even coverage, where reflector and projector have a good 2cm of epoxy either side of the hole. You cant ever really use too muh, but use common sense. A good, 4-5 cm wide layer around the bowl will hold the projector well enough that once set, youll smash the reflector before cracking the join of epoxy between the two surfaces. Re assembly 8. once everything is cure and ready to re install, run all your cable through your parker hole and/or pre drilled holes, and re-seal as per method 1. Congrats on your one off custom headlights! Yes its alot of work, and alot of people are worried to attempt such a job. 2 projectors I use mocked up for recess depth purpouse painting parts required for passive devils eyes testing alignment and output finished product before sealing what a passive deviles eye looks like assembled that they look like after a buff the whole system with HD relay this is an fg light, great fun to split! ( I mean cut ) twin mock up another passive blue devils eye1 point
-
I've had a little project on the go for a bit. Not my car but the basics are late bf sedan fg turbo engine, bf f6 pcm and ZF6 and a few other bits and pieces. A couple of shops here in Perth (not xft or monsta torque) have had the car and haven't been able to sort it. I found a heap of config issues between the ic/pcm/abs and tcm. I've worked through those but still had an issue with the car grabbing neutral on the 2/3 shifts under load. I was about to condemn the trans but noticed some weirdness in the logs from the abs unit and tcm. In the course of testing it broke the lh inner stub axle (no skids not my car) do after searching around u found a complete bf f6 rear cradle with repco shafts and sp diff bushes from a local wrecker. The owner managed to grab this for a song so with the help of my Son, my Dad, Turbo Knapp and his rodeo and eventually even the wife we got it from its resting place in the front packing Bay around the back and on the hoist. I then set about removing the rear end and too my surprise found the rear end the owner had paid one of the shops to install to suits the xf was actually a 4 spd open centre 3.43 The tcm ans pcm and even abs and David calibrations are all set up for a 2.73 lsd rear end! I'm pretty convinced there lies the issue. I believe the pcm and tcm are seeing an engine rpm, trans out put and wheel speed relationship that does correspond with the values allowed for the 2.73 rear and this is upsetting the whole deal Tl:dr Pulled a diff out and it's was diff(badoomtish)erent to what it should have been. Pics- Old rear end comes out New rear end goes in-1 point
-
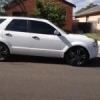
I think it is the dark blue offsetting the gold colour of the rim, that makes it pop, especially with the colour of the car.1 point
-
Having seen rim in person all I can say is they need to be out in the sunshine on a moving car for full effect. Good to see another turbo rocking quality jap wheels in proper offsets not chrome roh glares or similar.1 point
-
Congrats and hang in there. You're now in for the long haul. At least until they get to school. Manual brest pumps suck. The auto brest pumps make life easy, don't they turboknapp? The don't pull the hairs as bad. I am agree, there is something about those rims that just look awesome. Cant put my finger on jt.1 point
-
What rims are they? Love em, Ahh new bubba = no sleep, no life, less money, love my 2 to the moon and back but the brochure sounded heaps more fun lol1 point
-
Rookie mistake crashboy should set cruise to 77 as well1 point
-
you know what that means don't you Rab? you're perfect1 point
-
Got another toy the other day. Looks cool sitting in the garage with the G6 Sent from my SM-G920I using Tapatalk1 point
-
I like 7, but it's just a number like the rest.1 point
-
1 point
-
Better get into the AFG track soon because won't be there for much longer. Talk of noise complaints..... At an airport. Noise complaints. [emoji29]1 point
-
Fun cruise. I think I'll whack a new o2 sensor in on monday. was that the last video before we split up peter? I heard bang bang bang and the flame explains it. Also keen on some track time some day to increase my skills, but I also didn't know some of the roads and it was night time haha.1 point
-
Looks fantastic as always, love the glowing brake rotor shots1 point
-
This cruise was off the hook1 point
-
Dumb suggestion time. Why not just whack a standard cat in there. That should drop the boost a bit wouldn't it? Heres part art one of splitting the housing1 point
-
Fark where does the time go. Bit over two years since we lost this great fella. Long live the memories...1 point
-
Yes there are tips n tricks but bugger up the rotation even a little bit and you'll be in rage mode as nothing will line up it's something you need to do very precisely it sounds like you should let your tuner do all this for you so it can be installed,set,tuned in one go1 point
-
Friend of a friend Chris I'll see if those guys wanna come along again1 point
-
Yeah it was a joke for the G6ET leave it as is and just upgrade the brakes to start with followed by mods when you want to. What state you in we can recommended places to take you car. if in NSW I recommended CMS Telephone: 02 9826 86641 point
-
LOL. If you think that is provocation......you need to get outside more. Try being the bigger man and not responding. It'll put hair on your hamsternads.1 point
-
2 more pics from the June track day. Was raining all morning but track dried pretty well by lunch time. 1st session on black ice with r7 grooved slicks were 1min 40 laps with brown undies.

 1 point
 -
If it breaks it will make for interesting viewing!1 point
-
Little update after the last visit to profile. Clint gave it the once over and oil change and then ran it up on the dyno and refreshed the tune. Amazingly its been years since the last tune was done and ive got to say this new tune that hes done is f*cking CRISP! the car goes so sweetly Im stoked with it again. It was hammering before and drove awesome but with the fresh tune its whipping. Keen to get back out to willowbank again now. Sent from my SM-G920I using Tapatalk1 point
-
Ok, I'm a bit late but I'll throw my 2 cents in seeing as I also own a TT (F6X) but I purchased mine 2nd hand and modified... My mods consist of 60lb Siemens Injectors, Debunged exhaust and the cat has been punched out. Intake is standard but the whole bottom front of the air box has been cut out with the usual K&N filter in place. The intercooler consists of an original Process West Stage 3 intercooler flipped upsidedown and custom stainless steel piping with EXTERNAL diameters of- Hot side 2.5in and the hot side is nearly 3inch (75mm?). The hot side in my opinion is to small but I'll look into it when I fit my 4in dump pipe and maybe a valve that opens to atmosphere after the cat so it flows 4in or similar as exhausts for Territories are rapists at the minimum! I know the exhaust will sound like poo when on full boost but hey, it's cheap!!! Those few mods above with which the intercooler is the most significant did a 12.??sec 112mph from memory in the hands of the previous owner so we are looking at 280-290awkw and might I add that there aren't allot of cars on the street that can match me to 200mtrs...1 point
-
I forgot to add... The front and rear diff bushes as well as other components are cheap to buy but a nightmare to do it yourself. Even for skilled backyard mechanics. Get an inspection report from a reputable suspension place.. I strongly suggest not to go to Pedders for their $28 report because I and at least 1 other Territory owner I know of got bad advice. Cost is minimum $1500 to $3000 for drive in drive out and you only need to do it once. Nolathane Urathane recycled condoms anything but what Ford has fitted will be better and completly change the way these buses handle. Seems even @ 40,000km these bushes seem to let go. I have Plazmaman valve springs 1000kpm injectors Walbro intank fuel pump a FMIC (no plumbing) but fits and performance nicely Plazmaman cold air intake K&N filter some still new some done less than a 1000km which I can sell you cheap if your intrested just PM me. (dunno if Im allowed advertise here but sh*t have I spent some money with donating sponsors on here)1 point


This leaderboard is set to Sydney/GMT+10:00