Leaderboard


Popular Content
Showing content with the highest reputation on 12/07/13 in all areas
-
Bitchmod was at my house yesterday. Studded into the kitchen "make way for a mod" He cooked dinner "mod power" In bed " how's it feel to be sleeping with a mod" Maybe I'll take that ban instead of putting up with that...4 points
-
Bitchmod is gay.......Bitchmod needs to get in the kitchen and make me a sammich3 points
-
Thank f*ck for that. We were getting worried2 points
-
My username2 points
-
Enjoy This is my Friday night.2 points
-
Pram wheels lol2 points
-
Nice rant. They probably said the same thing about windscreen wipers back in 1910. Don't get me started in indicators, ABS, stability/traction control, air-con, stereos, headlights, power steering, suspension, electric starters...they all take away from the real driving experience don't they. It's an absolute farkin disgrace.2 points
-
You will now.... Lol2 points
-
I'd hate to be a mod around here. I find being CC better as it restricts my damage to the WA section where I belong and makes joke edits of others posts funnier as there's no hiding the fact I am responsible. Cleaning up after sh!tposters like myself would drive me even crazier than I already am! Plus I have enough responsibility at work, screw having it on my hobby forum!2 points
-
Its all part of the plan.The last clown from Vic we made a mod cracked the shits and left See what we are playing at..........?2 points
-
Keep ba for 20 years... Put hydrogen motor in it.1 point
-
Just buy the insulation and use the clips from the original bonnet, save yourself $75. I got my chrome strip off my original bonnet no worries at all didnt snap it, it just clips in.1 point
-
J@s not ghey, just knows a good looking bloke when he sees one1 point
-
1 point
-
Needs more semi naked freezer .......1 point
-
Rob's a great guy & a good tuner definaly in good hands........1 point
-
yep another one for rob, very good service and dosnt charge the earth, very happy1 point
-
That much I know. Getting big is easy. Being big and lean is bloody hard.1 point
-
Yep it's great having BB as my Avi1 point
-
Seriosuly doubt its the CAS. They are a very simple sensor that will either work or it won't. Do you have a coolant leak by anychance? Coolant has been known to leak from the thermostat housing and drip into the CAS plug and cause issues. You can remove the PCM plugs without removing the PCM. There are access holes in the mount that allow you to pop the retainers back and remove the plugs. To remove the PCM shear bolts you need to cut a groove in them with either a hack saw or dremel then use a large flat bladed screw driver to remove.1 point
-
Just had my Xr6T tuned by Rob & Darren at monsta. Have a look in the Ute thread as there is a chart. Mods - 5" venom cat growler air box ID1000's Muffler delete Generic Stepped cooler with herrod pipes. Listen to Rob and Darren, especially on Coolers. Rob has done his own testing with his XR6T ute, tried many coolers. So he does have the real time knowledge to back his results. Monsta Torque great service, NO BS, highly recommended.1 point
-
f*ck carlton Pazz, if their car show is anything like their footy team its going to be sh*t.1 point
-
We don't hang out with mods1 point
-
Sweet, I've heard nothing but praise for them. So I think my tuner has now been selected lol. I don't supposed you've heard the exhaust note of their stainless system that comes with their FG XR6T packages have you? Curious as there was already an xforce system on mine when I bought it a few months back so I may not even need the exhaust, save a bit of money lol1 point
-
great place mate, Rob is an awesome person to deal with, iv had countless amount of work done by him and he will always look after you.1 point
-
Hi guys, have not posted in a while - and need to if I want to keep my account open. No other reason for posting.1 point
-
OP has been updated to include everyones most up to date times.1 point
-
^^^^^ Thanks will have to change that tip ^^^^1 point
-
He is already drunk off this newfound power!1 point
-
Sri Lanka 201 (48.5 ov) India 203/9 (49.4 ov) India won by 1 wicket (with 2 balls remaining)1 point
-
300rwkw went 118mph1 point
-
England 215 & 80/2 (43.0 ov) Australia 280 England lead by 15 runs with 8 wickets remaining Stumps - Day 21 point
-
^^^^^^^^^^^^^^^^^^ too many lols im finished, one of the best comebacks evar1 point
-
Morning... Need to go buy a carbon fuse cover now.1 point
-
Morning all. Just noticed my name change... Lol1 point
-
Fckin annoying video... -4-x-4-r-44-t. Bloody awful remote.1 point
-
1 point
-
1 point
-
Im fitting spool pump gears in my oil pump, has anyone seen the extra port work done by atomic to the releave the oil pressure off in the relief valve.1 point
-
Chit. Wogpot is a mod now? If you don't hear from me again assume he has banned me for previous gypsy Bosnian lebo jokes.1 point
-
^ Reeeeee ooooooooor reeeeeee ooooooooor reeeeeeee oooooooooor1 point
-
From what I've read on here that most members run SSSL'S on the rears and SSL'S on the fronts. it does sit nicely.1 point
-
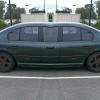
just you mate,that looks absolute sex in standard form...1 point
-
means its perfect, comp should be 180psi. 180,000k and still goin strong ....... best engines in the world1 point
-
If you get an XR6T, you'll regret not getting an F6 down the line. I know I did.. lol. ..Twice!1 point
-
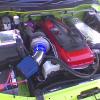
Emmmm that's one sexy hole. Although I like the install and neatness of it, if you wanted to remove everything to sell it stock this is when youd run into a problem. All in all you've done a great job of it and it does look good. As long as your happy it doesnt matter what others think.1 point
-
I'm a fitter by trade so I felt safer with the file lol, plus I don't own one Can't really go wrong with a half round... Plus with a file, you can work your way TO size without maybe being over from the start with a holesaw1 point
-
Ok, so not sure if I should be making a new thread for this. But Moderators can cut and paste it if they want to. Mounting boost gauge in FPV starter location: In this case I used a "52mm" boost gauge.. Parts/Tools required - *Gauge & install components *EXTRA power/earth wire *Pencil *Stanley Knife *Scissors *Drill with 2mm drill bit (anything pretty small really) *Smallest flat head screwdriver you can find *Hammer *Half round file *Vacuum Cleaner *Torch *Solder iron *Elec tape *And last but not least - Patience! Firsty, I got all the main work out of the way such as running the boost line through firewall and to the T piece at BOV. Now pop off your TC/Foggy switch with your hand or a flat head driver if stubborn and find your illumination and earth wires. Mine were BROWN (Foggies) and black (TC). Feel free to do your wiring at this point if you please.. While your switches are out of the dash use a torch and your fingers to feel in behind the dash to make sure the space where the gauge is going is empty (BA/BF XR models should be clear). Now this is your last chance to back out.....Otherwise use the rear of your gauge (not the LARGER front facia ring) and place it on the dash where you want it to sit and draw around it with a pencil/marker. If your gauge is like mine and has bolts on the rear and you cannot sit it flush to draw around - Find something around the same size. Smaller the better! Now cut on around the INSIDE of your marked circle with a stanley knife SLOWLY & NEATLY. You don't have to push hard as there is solid plastic behind the foam. Remove the circle/foam you just cut out.. Use your drill and small drill bit to go around the circle and drill as many holes as you can through the plastic really close together. Get a tiny flat head driver and a hammer - Punch through the plastic between holes and it should just fall out. Don't worry if it falls into dash as it falls down into drivers footwell straight away NOWWW comes the messy frustrating part! Use your half round file to file around the inside of hole until it feels smooth and continue to do so while testing your gauge every couple of mins.. You don't want to oversize your hole otherwise you've wasted your time and effort and your gauge won't sit tight and snug! If it starts to feel like your file is rubbing on your dash vinyl too much, stop and use scissors to take extra off around the hole..Little by little - Don't get carried away. When your Gauge feels like it's really close to going through the hole, just file that tiny bit more evenly inside hole and give it another go.. Remember you want to leave the outside vinyl a fraction smaller than the hole you're filing in the plastic so that when you do push gauge in, your front facia ring is covering the hole and looks perfect. If you haven't wired up your gauge, do so now and when your feeding your boost line up from firewall you should keep your TC/FOGGY switch off to use that hole to help you get it up to your new gauge hole. Makes it easier There is not one piece of your dash that needs removing for this install. Just the TC/FOGGY switch and your set! Now when you're happy with your install - GET TO CLEANING lol happy vacuuming. Hopefully I haven't missed anything and you have success if you try this install PICTURES of finished install at top of page Goodluck, Josh!1 point
-
While cranking just put your foot flat down on the throttle as it stops the injector cycle so you can crank without getting any fuel in the cylinders.1 point
-
NOTE: This thread was compiled with a BA XR6T in mind, other variants and the newer models use a different filter - Ford part# AFL101. Otherwise the process is still the same. I thought I would write up a quick How To on doing an oil change. Some of you may say it’s easy, but for the less mechanically inclined members I thought it is a good idea. May be the Mods could start a Maintenance heading for the basic mods and maintenance that is often asked about on this forum. To Change the Oil you will need the following: Z9 Oil Filter (Repco or any parts store) or AFL1 (Ford Part Number) 6.5Lt of oil (Magnatec or 10w50) 17mm Ring Spanner Oil filter strap/wrench Oil drop bucket 20 mins of time. I recommend that you change the oil when the car is warm (NOT HOT) as it makes the oil more liquid and will allow it to drain easier. You will need to elevate the left front of the car using car ramps or jacks (use stands). Remove the oil cap then under the car and place the oil bucket under the drain plug. Remember the oil will come out with a bit of pressure, so make sure you move the bucket to compensate for the distance the oil will travel. Using the 17mm ring spanner undo the sump plug/bolt until its finger loose and then remove the bolt by hand. Do not drop the bolt into the oil and remember the oil can be HOT. Wait for the oil to empty, when it is just dripping replace the sump plug. Using the filter wrench loosen the oil filter Anti clockwise until it’s loose. By hand undo the filter and once removed DO NOT invert it as it will be full of hot oil. It’s also advisable to put the oil bucket under the filter position to catch the trickle of oil. Tip the excess oil out of the filter into the bucket. Getting the new oil filter, dip your finger into the old oil and smear around the rubber ring on the top of the new filter. This will give you a better seal on the filter and prevent the rubber pinching when you tighten the filter. Screw the filter in clockwise and tighten up hand tight. Do not try to over tighten as it will leak, hand tight is fine. Check to make sure the sump plug is in and everything is clear from under the car. Pour the new oil into the oil filler, put in 5lt initially and then check the dipstick (wipe before checking) and fill to the Full mark. Check for any leaks on the ground. The BA's have a feature that when you floor the accelorator and try to start the car it will not start. This is a good way to get the oil flowing around the motor without starting. I suggest 2 x 5 second crankings to get the oil around. Then just start the engine as normal. DO NOT rev the engine, let it idle for about 1 min and keep checking around the filter and plug for leaks. Stop the engine and check the oil level. It will require more oil as the filter would have filled with oil. Once the oil is right check for handprints or any spilt oil and clean up. Place the old oil into a suitable container and dispose in an oil recycling depot (most tips). You have just changed your oil and saved about $60+ in the process. I am going of memory for the oil capacity, so make sure you have enough and check before adding anymore. I also recommed that you use a mineral based oil like Castrol Magnatec for the first 15,000km and not a synthetic oil. This will allow the motor to bed in properly. In the Turbos, you should change your oil every 5,000-7500km and not the recommended 15,000km that Ford thinks is suitable.1 point


This leaderboard is set to Sydney/GMT+11:00